
Best AeroPress Brewing Method (2026): 5 Ways Compared
The best AeroPress brewing method depends on what you want in the cup. If you want a clean, bright mug with almost no fuss, the classic standard method is still the one I’d hand most people first. If you want a punchier cup, an easier travel setup, or a darker-roast recipe that does not taste like burnt toast, there’s a better fit.
Best AeroPress Methods for Real Life
Pick your method by cup style, speed, and how much morning fuss you can tolerate
Beginner
Clean cup with the least drama
- Paper filter clarity
- Easy to repeat
- Fast cleanup
- Best starting recipe
Top Pick AeroPress Original
$
Classic everyday method
Check Price on Amazon Stronger
Bolder body and less drip-through
- No-drip immersion
- Denser concentrate
- Reusable metal filter
- Great with milk drinks
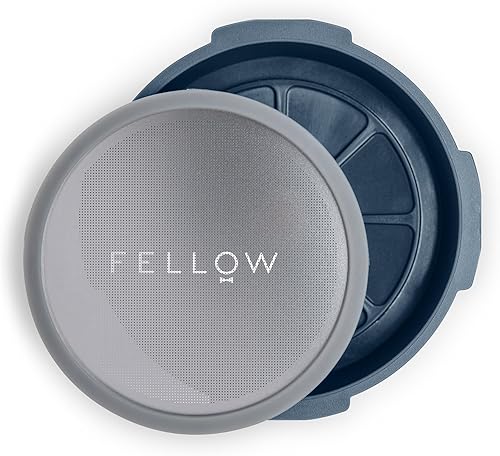
Top Pick Fellow Prismo
$
Best for fuller cups
Check Price on Amazon Travel
Small kit, low mess, easy packing
- Cup stores the brewer
- Lightweight setup
- Quick office brew
- Camping friendly
Top Pick AeroPress Go
$$
Best portable workflow
Check Price on Amazon Dark Roast
Smoother cup with better heat control
- Lower-temp pours
- Gentler extraction
- Less bitterness
- Easy recipe tuning
Top Pick Fellow Stagg EKG
$$$
Best for temp control
Check Price on AmazonQuick answer: the classic standard AeroPress method is the best overall because it is repeatable, clean, and easy to troubleshoot. For beginners, start there with paper filters and a medium-fine grind. If you want a stronger, fuller cup, switch to a no-drip immersion setup with the Fellow Prismo. If you travel a lot, the AeroPress Go is the most practical way to keep the workflow simple.
Quick picks
Our Top Picks

Comparison table
| Method | Best For | Ratio Start | Grind | Steep / Press | Flavor | Cleanup | Gear |
|---|---|---|---|---|---|---|---|
| Classic standard | Most people, most coffees | 1:16 | Medium-fine, like table salt | 1:30 steep, 30 sec press | Clean, sweet, balanced | Very easy | AeroPress |
| No-drip immersion | Bolder body and fuller cups | 1:14 | Medium-fine | 1:45 steep, 20-30 sec press | Heavier, richer, less papery | Easy | Prismo |
| Concentrate then dilute | Strong coffee and milk drinks | 1:8 in brewer, then top up | Fine to medium-fine | 1:15 steep, 30 sec press | Dense, punchy, flexible | Easy | Scale |
| Travel method | Office, hotel, camping | 1:15 | Medium-fine | 1:30 steep, 25 sec press | Balanced with low mess | Very easy | AeroPress Go |
| Low-bitterness dark roast | Smoother darker beans | 1:16 | A touch coarser than standard | 1:15 steep, gentle 25 sec press | Rounder, softer, less harsh | Very easy | Kettle |
How we evaluate
We compared these AeroPress methods on the stuff you actually notice at 7 a.m.: how easy they are to repeat, how the cup tastes, how much they drip or stall, and how annoying the cleanup feels after the caffeine rush wears off. A recipe can look clever on paper and still be a pain in real life. That matters.
We also looked at the gear each method asks for. Some recipes are forgiving with just the brewer and paper filters. Others get much easier when you add a flow-control cap, a scale, or a precise kettle. I’m not interested in turning a simple brewer into a science project unless the payoff is obvious in the cup.
Best AeroPress methods reviewed
1) Classic standard method — best overall
This is still the method I’d tell most people to learn first. Use a medium-fine grind, add about 15 grams of coffee, pour 240 grams of water, give it a short stir, steep for around 90 seconds, then press gently. The cup comes out clean, sweet, and easy to read. If something tastes off, you can usually tell whether it needs a finer grind, cooler water, or a little more steep time.
That clarity is the big win. Paper filters keep the body lighter than metal-filter recipes, so fruit notes and sweetness show up without a muddy finish. It is not the boldest AeroPress cup possible, but it is the most dependable all-rounder. Honestly, if you only ever use one method, this is the one.
Pros
- ✓ Easy to learn and easy to troubleshoot
- ✓ Clean cup with very little sediment
- ✓ Works well across a wide range of coffees
Cons
- ✗ Not the fullest-bodied option
- ✗ Can taste a little thin if you underdose or grind too coarse
2) No-drip immersion method — best for stronger cups
If the standard method tastes a little too light for you, this is the next move. The Fellow Prismo stops the brewer from dripping before you are ready, so you get a true full-immersion steep without flipping the whole thing upside down. That means more contact time, less panic, and a cup with more body.
It is especially good if you like a shorter, stronger mug or you often add milk. The flavor lands thicker and a little denser, almost like moving from skim milk to whole milk. You do give up some paper-filter sparkle, and cleanup takes one extra rinse, but the trade is worth it if you want a bolder AeroPress routine without the mess risk of the inverted method.
Pros
- ✓ No hot-coffee balancing act like inverted recipes
- ✓ Richer body and less drip-through
- ✓ Great for stronger brews and milk drinks
Cons
- ✗ Adds one more piece to clean
- ✗ Less clean and bright than paper-only brewing
3) Concentrate-then-dilute method — best for a flexible strong base

This is the method to use when you want something stronger than the classic recipe, but you still want control after the press. Brew a smaller, denser shot of coffee in the AeroPress, then top it up with hot water until it tastes right. It is simple, but the scale matters here because eyeballing the dilution usually turns a good cup into a guessing game.
I like this method for people who bounce between black coffee and milk drinks. One concentrated base can go a few different directions. Add hot water for an Americano-style cup, or keep it short and punchy. The downside is that it is easier to go too strong and flatten the flavors if you push the ratio too hard.
Pros
- ✓ Very easy to tune after pressing
- ✓ Works well for stronger coffee styles
- ✓ Helpful if different people want different strength levels
Cons
- ✗ Needs better measuring discipline
- ✗ Can taste blunt if you over-concentrate the brew
4) Travel method — best for light packing and low mess
The best travel AeroPress method is not radically different from the classic one. The trick is cutting friction. The AeroPress Go keeps the brewer, mug, and accessories packed together, so you spend less time hunting for bits and more time making coffee before a meeting, train ride, or campsite breakfast.
Keep the recipe conservative: medium-fine grind, roughly a 1:15 ratio, short stir, short steep, gentle press. That gives you a balanced cup without asking for perfect water or a full home setup. It is not the most precise way to brew, but that is the point. Travel coffee should be good and easy, not precious.
Pros
- ✓ Compact all-in-one kit
- ✓ Fast cleanup in hotel or office sinks
- ✓ Keeps the AeroPress learning curve familiar
Cons
- ✗ Smaller cup and tighter workspace
- ✗ Less fun for bigger experimental recipes
5) Low-bitterness dark roast method — best for smoother darker beans

Dark roasts go bitter fast in an AeroPress if you blast them with boiling water and leave everything else unchanged. This method fixes that by lowering the water temperature a bit, using a slightly coarser grind, and keeping the press gentle. A temperature-controlled kettle makes this much easier because you can stop guessing and just pour where the coffee tastes sweeter.
The cup you get is rounder and calmer. Think dark chocolate instead of ashtray. You still get body, but the rough edges back off. If you mostly buy darker beans and keep wondering why your AeroPress tastes harsh, this method is probably a bigger upgrade than buying a totally different brewer.
Pros
- ✓ Tames bitterness in darker roasts
- ✓ Makes recipe changes easier to repeat
- ✓ Improves both AeroPress and pour-over workflow
Cons
- ✗ Requires more gear than a bare-bones setup
- ✗ Overkill if you only brew one coffee the same way forever
How to fix a bad AeroPress cup without starting over
If your coffee tastes sour — sharp like lemon water instead of sweet like citrus — your method is usually under-extracting. That just means the water did not pull enough flavor from the grounds. Before you tear up the whole recipe, change one thing. Grind a little finer, steep a little longer, or use slightly hotter water. The classic standard method is the easiest place to learn this because the cup stays clean enough that the problem is obvious.
If your cup tastes bitter or hollow, back off. Dark roasts especially can go from chocolatey to harsh fast. Lower the water temperature, press more gently, or shorten the steep. This is why I like the low-bitterness dark roast method so much. It gives darker beans a little breathing room instead of beating them up with heat and over-contact time.
If the coffee tastes muddy, the issue is often body without clarity. A metal filter or concentrate-style recipe can do that if your grind is too fine or your coffee is producing too many fines — basically tiny dust-like particles. That is when a better grinder helps. The best AeroPress grind size guide matters more than another random recipe from social media, because grind changes show up in the cup immediately.
If your press feels way too hard, do not force it. That usually means the grind is too fine or the filter is clogging. Forcing the press is how people end up wearing coffee. Back off, go a touch coarser, and keep the plunge smooth. Think steady hand pressure, not a gym rep. AeroPress works best when it feels controlled.
The biggest mistake is changing three things at once. Keep the dose the same, keep the water amount the same, and then adjust one variable. That is boring advice. It is also the fastest way to get delicious coffee on purpose instead of by accident. If you want a tighter workflow, pair this page with our guides to brew time and brew temperature so your tweaks stay simple.
Frequently asked questions
Is the standard AeroPress method better than inverted?
For most people, yes. The standard method is cleaner, simpler, and less likely to end with hot coffee all over the counter. Inverted can work, but a no-drip cap like Prismo gives you most of the same full-immersion benefit with less risk.
What ratio is a good starting point for AeroPress?
A good starting point is around 1:15 to 1:17 for a normal cup, which usually means roughly 15 grams of coffee to 225 to 255 grams of water. For a stronger concentrate-style brew, use less water in the brewer and dilute after pressing.
How long should an AeroPress brew take?
Most balanced AeroPress recipes land around 1 minute 30 seconds to 2 minutes 30 seconds from pour to press. Shorter brews can taste sharp and sour. Much longer brews can flatten the cup or pull more bitterness from darker roasts.
How do you avoid bitter AeroPress coffee?
Start by lowering water temperature a little, especially with darker roasts. Then check grind size and press gently instead of forcing it. If the coffee still tastes harsh, shorten the steep slightly before changing everything else.
Related guides
- Best AeroPress Brew Time if your cup tastes good one day and flat the next.
- Best AeroPress Brew Temp if darker roasts keep turning harsh.
- Best AeroPress Grind Size if your press feels too easy or way too hard.
- Best AeroPress Go Recipe if you want a cleaner travel workflow.
- Best AeroPress Filters if you want to change clarity, body, or cleanup style.