
Best AeroPress Brew Temp (2026)
The best AeroPress brew temp depends on your beans, but you do not need to turn it into a science project. Start cooler for dark roast, hotter for light roast, then nudge it up or down by taste until the cup feels sweet, round, and clear instead of sour like lemon water or harsh like over-steeped tea.
AeroPress Temperature Starting Points
Start a little cooler for dark roasts, a little hotter for light roasts, then fine-tune by taste
Step 1 Dark roast
- Start at 175-185°F
- That is 79-85°C
- Keep steep time short
Step 2 Medium roast
- Start at 185-195°F
- That is 85-91°C
- Best place for most people to begin
Step 3 Light roast
- Start at 195-205°F
- That is 91-96°C
- Give it more heat to wake up sweetness
Result
Better balance in the cup, with less guessing and fewer sour or bitter surprises
Quick answer
Start here: dark roast usually tastes best around 175 to 185°F (79 to 85°C), medium roast around 185 to 195°F (85 to 91°C), and light roast around 195 to 205°F (91 to 96°C). If your cup tastes sour, flat, or oddly thin, go hotter. If it tastes bitter, sharp, or kind of woody, go cooler.
Think of temperature like a volume knob for flavor. Turn it up and the water pulls more out of the grounds. Turn it down and the cup gets softer and easier to drink. The trick is not chasing the hottest water possible. The trick is landing where your coffee tastes balanced.
For most people, the easiest starting recipe is 15 grams of coffee, 240 grams of water, medium-fine grind, 90-second total brew time, and 190°F (88°C). Brew that first. Then change temperature before you mess with everything else. That keeps the result easy to read.
What you'll need
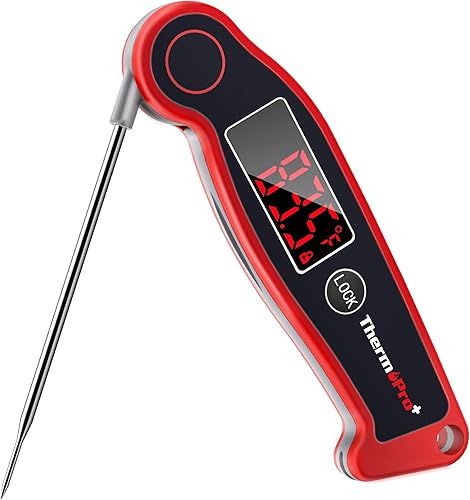
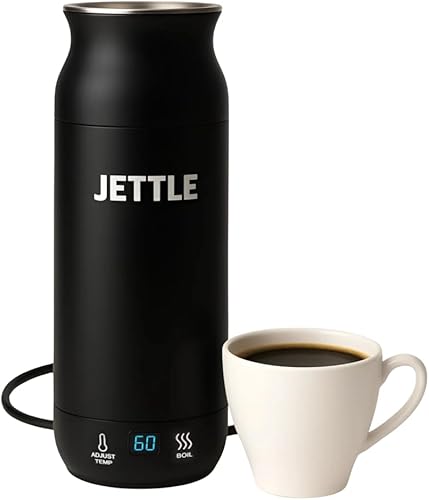
You do not need fancy gear to figure this out. An AeroPress, decent beans, a timer, and a way to check water temp are enough. If you already own a kettle, pair it with a simple thermometer and call it a day. If you brew AeroPress every morning, though, a temp-control kettle is one of those upgrades that quietly makes life easier.
The Fellow Stagg EKG is the easy luxury pick here because you can set the temperature and stop thinking about it. If you want the cheap route, the ThermoPro TP19 does the job just fine. And if your AeroPress lives in a suitcase or office drawer, the Jettle travel kettle makes a lot more sense than dragging a full-size kettle around.
If you are also trying to tighten up the rest of your recipe, our coffee brewing ratio guide helps you keep dose and water steady. If you are switching between AeroPress and immersion brewers, our AeroPress vs French press guide shows why the cup changes so much. And if your grind is all over the place, that matters more than people think. A burr grinder makes dialing temperature much less frustrating, even if our espresso grind guide is aimed at a different brew style.
Our Top Picks
How to dial in the best AeroPress brew temp
1. Pick your roast-based starting point
Start with roast level because it gives you the fastest honest answer. Dark roasts are more soluble, which is just a nerdy way of saying they give up flavor more easily. That is why they usually taste better with slightly cooler water. Light roasts are the opposite. They are tighter, denser, and usually need more heat to taste sweet instead of grassy or sour.
Here is the simple version:
- Dark roast: 175 to 185°F (79 to 85°C)
- Medium roast: 185 to 195°F (85 to 91°C)
- Light roast: 195 to 205°F (91 to 96°C)
If you have no idea where your beans sit, treat them like a medium roast and start at 190°F, or 88°C. That is the middle of the road. Not sexy. Very useful.
2. Brew one boring baseline cup
This part matters. Keep everything else the same so temperature is the only lever you are pulling. Use 15 grams of coffee, 240 grams of water, a medium-fine grind, 30 seconds of stirring and steeping, then press slowly over the next 30 to 45 seconds. Nothing fancy. Just consistent.
Why so plain? Because if you change grind size, brew time, and temperature all at once, you learn nothing. A sour cup could mean cooler water. It could mean the grind was too coarse. It could mean you rushed the steep. Keep the recipe boring first. Then the coffee tells you something useful.
3. Taste the cup like a normal person
You are not judging a competition table here. Just ask what the cup actually feels like. If it tastes sour like tart apple, thin like watered-down tea, or just weirdly empty in the middle, you probably need more heat. If it tastes rough, bitter, or dries your mouth out like cheap red wine, you probably need less heat.
The nice thing about AeroPress is how quickly it answers back. Small temperature moves show up fast, especially with medium and light roasts. That is why it is such a good brewer for learning what heat actually does.
4. Adjust temperature before you touch grind
If the cup is under-extracted — basically the water did not pull enough flavor out of the grounds — raise the temperature by 5°F, or about 2 to 3°C. If it feels over-extracted — too bitter, too dry, too much bite — lower it by the same amount.
Only after two temperature moves should you touch grind size or steep time. That order keeps the process clean. Temp first. Then grind. Then time. If you change grind too early, it gets muddy fast.
5. Match temp to grind and steep time
Here is where most people get tripped up: hotter water is not working alone. It teams up with grind size and contact time. A finer grind plus hotter water plus a long steep can hit your cup like a frying pan. Great if you want intensity. Rough if you went too far.
As a rule of thumb, use these pairings:
- Hotter water + coarser grind: good for light roasts that taste shy
- Cooler water + finer grind: good for dark roasts that get bitter fast
- Medium heat + medium-fine grind: best place for everyday medium roasts
If you want a cleaner, brighter cup, go a touch hotter and keep the steep a little shorter. If you want more body and softness, go a touch cooler and let the coffee sit a little longer. Not wildly longer. Just enough to round the edges.
6. Use a simple starting recipe, then climb the ladder
My favorite starting recipe for most beans is still the plain one: 15g coffee, 240g water, 190°F or 88°C, medium-fine grind, 90 seconds total. It is forgiving. It gives you a clear reference point. And it does not send you down a rabbit hole at 7 in the morning.
From there, make one move at a time. If the cup is too sharp, cool the water a little. If it feels dull, heat it up. If the taste is close but not quite there, then start playing with grind. That is how you figure out what your beans actually want instead of randomly poking at the recipe.
Common mistakes
- Using boiling water for every roast: light roasts often love it, but dark roasts can turn smoky and bitter fast.
- Going too cool on light roast: this is the classic recipe for a cup that tastes sour, salty, or unfinished.
- Changing three things at once: if you tweak temp, grind, and brew time together, you cannot tell what fixed the cup.
- Ignoring your kettle swing: some kettles drop heat fast. A target temp means less if the water loses 10 degrees before it hits the brewer.
- Trusting roast labels too much: one roaster's medium can drink like another roaster's light. Taste still wins.
Another sneaky mistake is chasing strength when the real problem is extraction. Strong coffee is not always better coffee. You can make a cup stronger by using more coffee, but if the water temp is off, the flavor can still feel hollow. Fix balance first. Then decide if you want the cup heavier.
Troubleshooting sour, bitter, and weak cups
If your AeroPress recipe keeps missing, use this adjustment ladder instead of guessing.
AeroPress Temperature Adjustment Ladder
Taste the cup, make one clean move, then brew again
Step 1 Sour or thin
- Raise water temp 5°F
- That is about 2-3°C
- Keep grind and time the same
Step 2 Bitter or harsh
- Lower water temp 5°F
- Shorten steep if needed
- Do not change dose yet
Step 3 Close, but not quite
- Hold temp steady
- Adjust grind one step
- Then fine-tune steep time
Result
A cleaner path to the sweet spot without changing everything at once
If the cup tastes sour, raise the temperature first. If it still tastes sour after one small bump, then tighten the grind a little. If the cup tastes bitter, lower the temperature first. If it is still rough, back the steep time down a bit. If the cup tastes weak but not sour, you might just need a slightly stronger ratio. That is where our brew ratio guide helps more than another temp change.
And if you are wondering whether AeroPress is just not the flavor shape you want, that is a fair question. Some people prefer the heavier body of a press pot. Our AeroPress vs French press comparison lays that out pretty clearly.
One last thing: fresh coffee changes faster than most people expect. A bag can taste lively and bright one week, then calmer and sweeter the next. So if your perfect setting drifts a little, that does not mean you suddenly forgot how to brew. It usually just means the coffee moved, and you need one small nudge to catch up.
If you are shopping for a better pouring setup, our best gooseneck kettle guide is the place to start. Better heat control does not magically make bad coffee great, but it does make repeatable coffee much easier.
Frequently asked questions
What is the best AeroPress brew temp for most people?
For most brewers, 185 to 195°F, or 85 to 91°C, is the sweet spot. It is hot enough to pull plenty of flavor, but not so hot that medium roasts get sharp or bitter fast.
Should light roast AeroPress coffee use hotter water?
Yes, usually. Light roasts are denser and harder to extract, which is just a fancy way of saying the water has to work harder to pull flavor out. Starting around 195 to 205°F, or 91 to 96°C, usually gives a sweeter and fuller cup.
Can water that is too cool make AeroPress coffee sour?
Absolutely. If your water is too cool, it often leaves the cup tasting thin, lemony, or unfinished. Before you blame the beans, bump the water temp up by about 5°F, or 2 to 3°C, and try again.
Do I need a temperature-control kettle for AeroPress?
No. It is nice, not necessary. A regular kettle plus a simple instant-read thermometer works fine. If you make AeroPress every day, though, a kettle with temp hold makes mornings much easier.