
Best AeroPress Coffee Ratio (2026): 5 Proven Setups for Better Cups
The best AeroPress coffee ratio for most people is 1:15. It gives you a cup that tastes sweet, balanced, and forgiving — not watery like weak diner coffee, and not thick and pushy like you are chewing the mug.
If you want a stronger cup, a bigger mug, or a mellower dark-roast brew, the “best” ratio shifts fast. That is the whole trick with AeroPress. You are not chasing one magic number. You are choosing the ratio that matches the kind of cup you want to drink tomorrow morning.
Best AeroPress Coffee Ratio: Quick Picks
Pick the ratio that matches the cup you actually want: balanced, strong, travel-friendly, or mellow and low-bitterness
Overall
Best everyday AeroPress starting point
- 15g coffee to 225g water
- Balanced sweetness and body
- Easy to tweak one notch at a time
- Great with the AeroPress Original
Top Pick 1:15 with AeroPress Original
$$
The safest daily-driver recipe
Check Price on Amazon Strong
Best for punchier cups and milk drinks
- 18g coffee for a stronger base
- Brew concentrated, then dilute
- Prismo helps reduce early drip
- Keeps flavor thick instead of sharp
Top Pick 1:12 final cup with Prismo
$$
The richer ratio for lattes and cortados
Check Price on Amazon Travel
Best ratio when your setup is tiny
- 14g coffee to 210g water
- Forgiving with hand grinders
- Works well in hotel or campsite routines
- Cleaner than guessing with scoops
Top Pick 1:15 with AeroPress Go
$$
Simple enough to repeat anywhere
Check Price on Amazon Low Bitterness
Best for darker roasts that go harsh fast
- 15g coffee to 248g water
- Paper filters keep the cup cleaner
- Lower temp softens roast bite
- Great for mellow morning cups
Top Pick 1:16.5 with paper filters
$
The smoother dark-roast option
Check Price on AmazonQuick answer: Start at 1:15 with the AeroPress Original if you want the safest all-around recipe. Move to a 1:12 final cup with the Fellow Prismo if you want something punchier for milk drinks. If your coffee keeps tasting bitter, back off to about 1:16.5 with paper filters and slightly cooler water.
Quick picks
Our Top Picks

Comparison table
| Setup | Best for | Ratio | Coffee | Brew water | Bypass water | Grind band | Water temp | Brew time | Cup profile | |
|---|---|---|---|---|---|---|---|---|---|---|
| AeroPress Original Coffee Press | A balanced daily mug with the easiest starting recipe | 1:15 direct brew | 15g | 225g | 0g | Medium-fine, like table salt with a little extra texture | 200°F | 1:45 | Balanced, sweet, and full without tasting heavy | Check Price |
| Fellow Prismo AeroPress Attachment | A stronger cup that still tastes controlled instead of muddy | 1:12 final cup | 18g | 140g | 75g | Medium-fine, just a touch finer than the daily recipe | 201°F | 1:30 | Punchy, syrupy, and sturdy enough for milk | Check Price |
| AeroPress Go Portable Coffee Maker | Travel, office brewing, and small-space routines | 1:15 direct brew | 14g | 210g | 0g | Medium-fine, forgiving enough for travel grinders | 198°F | 1:40 | Clean, lively, and easy to repeat away from home | Check Price |
| AeroPress Paper Micro-Filters (Standard) | Dark roasts that get harsh when you push them too hard | 1:16.5 direct brew | 15g | 248g | 0g | Medium, a little coarser than the daily recipe | 195°F | 1:30 | Smoother, gentler, and less bitter at the edges | Check Price |
| MiiCoffee Nano Coffee Scale with Timer | Larger mugs when you want more volume without a thin finish | 1:15 final cup via bypass | 18g | 160g | 110g | Medium-fine, consistent enough to handle concentrated brewing | 200°F | 1:45 | Bigger mug, still sweet and not washed out | Check Price |
How we evaluate
We looked at AeroPress ratios through the lens that actually matters: what lands in your mug, and how easy it is to repeat. A “good” ratio is not just strong or weak. It has to taste balanced, survive small mistakes, and fit a normal morning when you are not standing there with a clipboard and a stopwatch around your neck.
Repeatability came first. If a recipe only tastes good when everything goes perfectly, it is a bad starting point for most people. The best ratios leave you a little room. Miss the pour by a few grams, stir a touch too hard, or grind half a notch off, and the cup still tastes like coffee you want to finish.
Taste balance mattered next. The sweet spot is where the cup feels full enough to be satisfying, but still clear enough that you can taste the bean instead of just “dark coffee flavor.” Think of it like soup. Too much water and it tastes flat. Too little and it is all salt and no comfort.
Forgiveness to grind errors was huge. AeroPress can hide some mistakes, but not all of them. Ratios around 1:15 to 1:16 are usually easier to live with because they do not swing from sour to bitter as fast as tighter concentrate recipes.
Workflow speed and equipment dependency rounded things out. If a ratio needs a special attachment, a super-consistent grinder, and monk-level patience, you should know that before you try it. That is also why this guide links out to our best AeroPress brewing method, best AeroPress bypass recipe, and best AeroPress grind size guides. Ratio never works alone. It is always dancing with grind, time, and water temperature.
Ratio setups and supporting gear
1) 1:15 with AeroPress Original Coffee Press — best overall balance ratio
If you only remember one AeroPress recipe, make it this one. Fifteen grams of coffee to 225 grams of water gives you a cup that feels round and sweet without getting muddy. It is the ratio I would hand to a friend who just bought an AeroPress and wants good coffee tomorrow, not a month-long science project.
The reason it works so well is that it gives you room to move. If the cup tastes a little flat, grind finer. If it tastes a little bitter, drop the water temp a few degrees or shorten the steep. You are making one clean adjustment, not ripping the whole recipe apart. That is what makes 1:15 such a good home base.
Pros
- ✓ Easy starting point for most medium roasts
- ✓ Balanced body without tasting heavy
- ✓ Tolerates small grind mistakes better than stronger recipes
Cons
- ✗ May feel too gentle if you like punchy concentrate-style cups
- ✗ Less ideal for milk drinks unless you prefer a lighter base
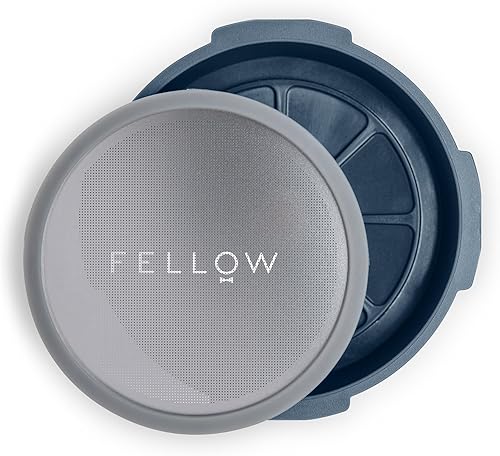
2) 1:12 final cup with Fellow Prismo — best strong ratio for concentrate drinks
If you want a stronger AeroPress cup, do not just cram in more coffee and hope for the best. That usually gets harsh fast. A better move is brewing concentrated, then adding bypass water until the cup lands where you want it. With Prismo, the workflow feels less drippy and a lot more controlled.
This setup shines when you want a short, rich cup or a base that can stand up to milk. It tastes thicker, a little more syrupy, and more assertive on the tongue. The tradeoff is that it is less forgiving. Grind too fine and the cup can turn bitter pretty quickly. So this is the “tasty once you know what you are doing” ratio, not the safest first date.
Pros
- ✓ Makes a stronger, richer AeroPress cup without tasting sloppy
- ✓ Prismo helps concentrate-style brewing feel more controlled
- ✓ Great fit for milk drinks and shorter cups
Cons
- ✗ Less forgiving than a 1:15 daily recipe
- ✗ Needs more careful grind control to avoid bitterness
3) 1:16.5 with AeroPress paper filters — best mellow ratio for dark roasts

Best Low-Bitterness Ratio
AeroPress Paper Micro-Filters (Standard)
Check price
Check Price on AmazonDark roasts can go from cozy to charred in one bad step. If your AeroPress cups keep tasting ashy, dry, or a little mean, loosen the ratio and cool the water down. Around 1:16.5 with paper filters is a much gentler landing spot. It smooths the edges without turning the cup into brown water.
Paper filters matter here because they pull some of the heavier sediment out of the cup. That gives you a cleaner finish and makes bitter roast notes feel less aggressive. It is the difference between eating toast with a little char and eating something you forgot in the oven. One is pleasant. The other tastes like regret.
Pros
- ✓ Softens harsh dark-roast edges nicely
- ✓ Paper filters keep the finish cleaner
- ✓ Great fix when your current recipe tastes bitter or smoky
Cons
- ✗ Can feel too light for people who love big body
- ✗ Not the best choice if you want a bold milk-drink base
4) 1:15 with AeroPress Go — best travel ratio
Travel brewing is where good intentions usually go to die. You are tired, the hotel kettle is questionable, and your grinder clicks feel like guesses. That is why the best travel ratio is not some flashy concentrate trick. It is a simple 1:15 recipe that still tastes good when your setup is less than perfect.
The AeroPress Go pairs well with that approach because the whole thing stays compact and predictable. Use 14 grams of coffee, 210 grams of water, and keep the grind in a forgiving medium-fine band. You get a cup that tastes lively and clear, even when you are brewing in a cabin, an office kitchen, or a weird Airbnb with one decent mug and no counter space.
Pros
- ✓ Simple to repeat away from home
- ✓ Forgiving when travel grinders are a little inconsistent
- ✓ Compact setup fits real travel routines
Cons
- ✗ Small format is not ideal if you need multiple big mugs fast
- ✗ You still need to weigh coffee if you want real consistency
5) 1:15 final cup on the MiiCoffee Nano scale — best bypass ratio for larger mugs

Bypass brewing is the best trick for bigger AeroPress mugs. You brew a smaller, stronger concentrate, then top it up with clean water. Done right, the cup tastes full and sweet. Done badly, it tastes stretched, like someone watered down your good idea. That is why a tiny scale matters so much here.
With the Nano scale, you can keep the split honest: 18 grams of coffee, 160 grams of brew water, then 110 grams of bypass water. That lands much better than eyeballing it. If you like a full 10-ounce mug but hate the thin, papery taste that weak AeroPress recipes can get, this is the workflow I would use first.
Pros
- ✓ Makes bypass recipes far easier to repeat
- ✓ Helps larger mugs stay sweet instead of washed out
- ✓ Tiny footprint fits cramped brew bars well
Cons
- ✗ A scale adds one more tool to your routine
- ✗ Bypass recipes still need decent grind consistency to really shine
How to fix sour, bitter, thin, or harsh AeroPress cups
Sour cup
Sour usually means the water did not pull enough flavor out of the grounds. Before you mess with the ratio, grind a little finer. If that still tastes sour, keep the grind where it is and add 10 to 15 seconds of contact time. One change at a time. Otherwise you will not know what actually fixed it.
Bitter cup
Bitter cups often come from grinding too fine, pushing brew time too long, or using water that is a little too hot for the roast. Coarsen the grind first. If you are brewing a darker roast, dropping from 200°F to 195°F can calm things down fast.
Thin cup
Thin is where ratio really matters. If the coffee tastes hollow instead of weak, use a slightly tighter ratio like 1:14.5 or brew concentrate and bypass later. If it tastes both thin and sour, the bigger issue is probably extraction, not just water volume.
Harsh cup
Harsh is the ugly mix of bitter, dry, and rough. Dark roasts do this when the recipe is too tight and the water is too hot. Move looser, filter cleaner, and treat the coffee more gently. This is where the paper-filter setup above really earns its keep.
Direct brew vs concentrate plus bypass
Direct brew is the easiest path when you want one normal cup and do not feel like fiddling. All the water goes in during the brew, so the cup develops in one smooth line. It is simple, forgiving, and usually the best place to start if you are still learning how grind size and time affect taste.
Concentrate plus bypass is different. You brew a smaller, stronger base, then dilute after pressing. That can make bigger mugs taste fuller and helps milk drinks keep their backbone, but it also exposes sloppy measuring fast. If you eyeball the dilution, the cup can go from rich to flat in one careless pour. That is why bypass recipes reward scales more than scoop-and-guess brewing ever will.
A simple AeroPress dial-in workflow
Change one thing at a time so the cup actually teaches you something
Step 1 Start
- Begin at 1:15
- Use 200°F water
- Keep brew time around 1:45
Step 2 Taste
- Sour? grind finer
- Bitter? grind coarser or lower temp
- Thin? tighten ratio slightly
Step 3 Repeat
- Lock in the best cup
- Write the ratio down
- Only then try a new roast or method
Result
Less guesswork, fewer bad cups, and a recipe you can repeat next week
Frequently asked questions
What is the best AeroPress coffee ratio to start with?
Start with 1:15. It lands in the sweet spot for most medium roasts because it tastes balanced, gives you enough body, and is easy to adjust without getting lost.
How do I convert an AeroPress scoop to grams?
Do not trust the scoop if you want repeatable coffee. A scoop can swing several grams depending on bean size and roast. A small scale is the easiest way to keep your ratio honest.
What AeroPress ratio works best for dark roasts?
Dark roasts usually taste better a little looser, around 1:16 to 1:17, with slightly cooler water. That softens bitterness and keeps the cup from tasting smoky and dry.
Why does my AeroPress taste weak even when I use more water?
Weak cups usually come from under-extraction, not just too much water. Grind a little finer first, then keep the ratio steady and taste again before changing three things at once.
Should I brew concentrate and add bypass water or just brew direct?
Brew direct when you want the simplest, most forgiving cup. Use a concentrate plus bypass workflow when you want a bigger mug or a stronger base for milk drinks without over-steeping the coffee.