
Best AeroPress Espresso Recipe (2026): 5 Methods
The best AeroPress espresso recipe for most people is a short, strong concentrate made with the AeroPress Original, 18 grams of coffee, about 60 grams of water, and a slow press. It is not true espresso. Still, it gets close enough to make a convincing americano, a solid iced latte, or a quick little shot when you do not have an espresso machine.
The mistake most people make is chasing café espresso from a brewer that was never built for 9 bars of pressure. That is how you end up with a cup that tastes like wet ash or lemon juice with trust issues. The smarter move is to pick the AeroPress method that matches your goal: thicker body, smoother finish, easier travel, or better milk drinks. That is what this guide does.
Best AeroPress Espresso Recipe: Quick Method Picks
Pick the recipe by the cup you want, not by internet coffee theater. None of these are true 9-bar espresso, but some get surprisingly close for the money and effort.
Daily Shot
Best balance of strength, sweetness, and low fuss
- 18 g coffee keeps it punchy
- Short steep avoids muddy bitterness
- Works well for americanos
- Easy place to start dialing in
Top Pick AeroPress Original Coffee Press
$
The safest recipe for most people
Check Price on Amazon Richer Body
Best if you want a thicker, heavier cup
- Prismo keeps the brew from dripping early
- Metal filter boosts body
- Great for iced lattes
- Feels closer to shot-style concentrate
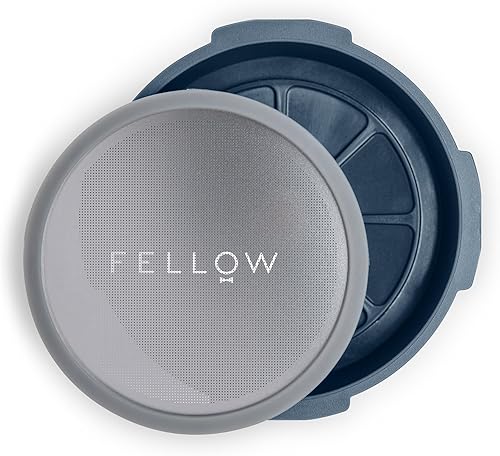
Top Pick Fellow Prismo Attachment for AeroPress
$
The richest cup in this guide
Check Price on Amazon Cleaner Cup
Best if bitterness keeps ruining your concentrate
- Paper filter keeps grit down
- Softer finish in milk
- Easy cleanup
- Good for darker roasts
Top Pick AeroPress Paper Micro-Filters (700 Count)
$
Smoother and easier to love
Check Price on Amazon Travel
Best compact setup for hotel rooms, hikes, and office drawers
- Brewer packs into its own mug
- Smaller recipe wastes less water
- Fast cleanup on the move
- Makes a solid faux shot anywhere
Top Pick AeroPress Go Travel Coffee Maker
$
The portable espresso-style fix
Check Price on AmazonQuick answer
Start with the AeroPress Original recipe if you want the safest all-around win. It gives you the best balance of strength, sweetness, and repeatability. If you want a heavier, richer faux shot, add the Fellow Prismo attachment. If you mostly make cappuccinos or lattes, the Flow Control cap makes the whole routine cleaner and easier.
For beginners, I would still skip the gadget pile at first. Learn one balanced recipe, taste it straight, then decide what you actually want more of. More body? Add Prismo. Less bitterness? Use paper filters and back the grind off a touch. More portability? Use the AeroPress Go and keep the recipe compact.
Quick picks
Our Top Picks

Comparison table
| Method | Dose | Brew water | Grind range | Steep and agitation | Press time | Yield | Best use-case | |
|---|---|---|---|---|---|---|---|---|
| AeroPress Original Coffee Press | 18 g | 55-60 g | Fine, like table salt | 10 sec stir, steep to about 0:40 | 20-30 sec | 30-40 g concentrate | Daily faux espresso, americanos, and quick milk drinks | Check Price |
| Fellow Prismo Attachment for AeroPress | 20 g | 50-55 g | Fine, just a touch coarser than espresso | 10 sec stir, steep to about 0:45 | 20-25 sec | 35-45 g concentrate | Richer body, no-drip setup, and stronger iced drinks | Check Price |
| AeroPress Paper Micro-Filters (700 Count) | 18 g | 60 g | Medium-fine, like fine sand | 8 sec stir, steep to about 0:45 | 25 sec | 40-45 g concentrate | Smoother cups, lighter finish, and less edge in milk drinks | Check Price |
| AeroPress Go Travel Coffee Maker | 16-17 g | 50 g | Fine-medium, a hair looser than the Original recipe | 8 sec stir, steep to about 0:45 | 20 sec | 35-40 g concentrate | Travel-friendly shots for americanos and camp lattes | Check Price |
| AeroPress Flow Control Filter Cap | 18 g | 60 g | Fine, between table salt and powdered sugar | 12 sec stir, steep to about 0:45 | 20-25 sec | 40-45 g concentrate | Milk drinks, cleaner workflow, and better brew control | Check Price |
How we evaluate
I care about repeatability first, because a great cup once is not a recipe. A good AeroPress espresso-style method should feel easy to hit again tomorrow, even before your brain has fully booted. That means the dose is simple, the steep is short enough to remember, and the press does not feel like you are trying to shove a plunger through peanut butter.
After that comes flavor intensity and bitterness control. Strong is not the same thing as good. Some recipes hit hard but taste like burnt toast soaked in aspirin. The better ones land thick and punchy while still leaving room for sweetness. When a method tasted too sharp, too dry, or too muddy on paper, it dropped down the list fast. Milk matters too. A recipe that tastes a little aggressive straight can turn lovely once it meets steamed milk, so I judged that separately instead of pretending one cup profile fits everything.
Last, I looked at workflow friction. AeroPress is fun because it is quick, compact, and forgiving. If a method needs too many weird little moves, it stops feeling like a smart shortcut and starts feeling like a hobby puzzle. Cleanup counts here too. Paper filters make a cleaner cup and a fast rinse. Metal filters leave more oils in the cup, which can be great, but they also ask for a little more cleanup. Neither is wrong. You just want to know what kind of morning you are signing up for.
Individual recipe reviews
1) Balanced daily espresso-style shot
Recipe: Start with 18 grams of coffee, 55 to 60 grams of water, and a fine grind about the texture of table salt. Stir for about 10 seconds, steep until roughly the 40-second mark, then press slowly for 20 to 30 seconds. You should get around 35 grams of concentrate.
This is the recipe I would hand to most people first because it tastes like the cleanest compromise. It is strong enough to scratch the espresso itch, but it does not push so far that every cup turns into a fight between sour and bitter. Straight, it is punchy and short. Add a little hot water and it becomes an easy fake americano. Add milk and it still holds up.
The main downside is that it will not wow people chasing a syrupy, heavy shot. AeroPress just has a ceiling here, and this recipe respects it instead of pretending otherwise. Honestly, that is why it works. It gives you something balanced and useful instead of over-promising and then smacking you with bitterness.
Pros
- ✓ Best mix of strength, sweetness, and low fuss.
- ✓ Easy to repeat without special accessories.
- ✓ Works well straight or diluted into an americano.
Cons
- ✗ Less body than the attachment-based recipes below.
- ✗ Still not a true espresso texture or crema experience.
2) Richer concentrate with a pressure attachment
Recipe: Use 20 grams of coffee, 50 to 55 grams of water, and a fine grind just a shade coarser than true espresso. Stir for 10 seconds, steep until about 45 seconds, then press for 20 to 25 seconds. Expect roughly 40 grams of thicker concentrate.
If you want the most shot-like body an AeroPress can reasonably give you, this is the method I would reach for. Prismo helps because it stops that annoying early drip and lets the water stay where it belongs until you are ready to press. The reusable metal filter also leaves more oils in the cup, which makes the texture feel fuller and a little heavier.
The trade-off is clarity. This recipe is not the smoothest or brightest. It is the bolder one. That makes it great for iced lattes, small flat whites, or anyone who thinks the standard AeroPress concentrate tastes a bit too polite. If you mostly drink straight shots and want less edge, the paper-filter recipe below will probably make you happier.
Pros
- ✓ Best body and weight in the cup.
- ✓ No-drip immersion feels easier to control.
- ✓ Excellent base for iced milk drinks.
Cons
- ✗ Metal filter can let more fines and oils through.
- ✗ Cleanup is a little fussier than paper-filter brewing.
3) Low-bitterness paper-filter version

Recipe: Use 18 grams of coffee, 60 grams of water, and grind a little looser than the daily recipe, more like fine sand than powdered sugar. Stir for about 8 seconds, steep to 45 seconds, then press over 25 seconds for around 40 grams of concentrate.
This is the recipe for people who keep making AeroPress concentrate that tastes too dark, too sharp, or weirdly dusty. Paper filtration trims the grit, smooths out the finish, and makes the cup feel more tidy. The result is not as thick as the Prismo method, but it is often easier to drink straight and much easier to turn into a pleasant cappuccino.
I especially like this route for darker roasts, because darker beans can tip bitter fast when you force them too hard. The cleaner filter and slightly easier grind give you more room to breathe. The only real downside is body. If you want a syrupy texture, this one will feel a little slimmer. If you want a cup that behaves better, that is exactly the point.
Pros
- ✓ Best choice when bitterness is your main problem.
- ✓ Cleaner cup with less grit and easier cleanup.
- ✓ More forgiving with darker roasts and milk drinks.
Cons
- ✗ Less body than metal-filter recipes.
- ✗ Can taste too light if your grind is too coarse.
4) AeroPress Go travel espresso-style method
Recipe: Use 16 to 17 grams of coffee with 50 grams of water, grind fine-medium, stir for about 8 seconds, steep to roughly 45 seconds, then press for around 20 seconds. You should get 35 to 40 grams of concentrate, which is enough for a small latte or a short americano.
This one wins on convenience. AeroPress Go packs into its own mug, wastes less water, and feels way more realistic when you are brewing in a hotel, at camp, or in an office kitchen with exactly one spoon and a questionable kettle. The cup is a little smaller, but honestly that is part of why it works. It keeps the recipe tight and concentrated without getting messy.
The downside is that it feels more cramped than the full-size brewer. You have less room for stirring and a little less margin for sloppiness. Still, if your idea of a good coffee setup includes “fits in the bag and rinses fast,” this is the one I would buy without overthinking it.
Pros
- ✓ Most portable way to get a solid faux shot.
- ✓ Compact recipe is easy to run with limited water.
- ✓ Fast cleanup makes it great for travel mornings.
Cons
- ✗ Smaller brew chamber gives you less working room.
- ✗ Not as easy to tweak as the full-size AeroPress.
5) Milk-drink optimized recipe
Recipe: Use 18 grams of coffee, 60 grams of water, and a fine grind between table salt and powdered sugar. Stir for 12 seconds, steep until about 45 seconds, then press for 20 to 25 seconds. Aim for 40 to 45 grams of concentrate, then add 5 to 6 ounces of steamed or frothed milk.
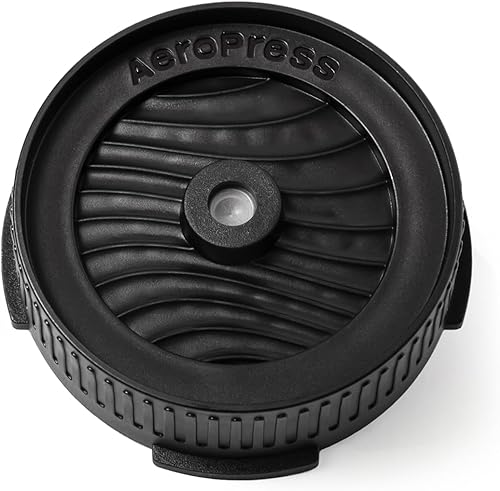
If milk drinks are your end goal, this is the most practical method in the guide. The Flow Control cap makes the brew chamber behave itself while you stir and steep, so you are not racing drips into the mug before the recipe is even ready. That sounds minor until you have made a few sleepy morning lattes. Then it feels like a very good idea.
Flavor-wise, this method gives you enough strength to punch through milk without turning harsh. It is not as thick as the Prismo recipe, but it is cleaner and easier to repeat. The only catch is that if you mostly drink the concentrate straight, the daily Original recipe still tastes a little more balanced on its own.
Pros
- ✓ Best all-around recipe for latte and cappuccino drinkers.
- ✓ No-drip workflow makes stirring and steeping less annoying.
- ✓ Strong enough for milk without tasting too rough.
Cons
- ✗ Less satisfying than the daily recipe if you drink it straight.
- ✗ Another accessory to buy if you are still figuring out the basics.
The easiest way to fix an AeroPress espresso-style recipe is to change one thing at a time. Not three things. Not five. One. Otherwise every cup becomes a mystery and you learn nothing except new ways to waste beans.
Fix the cup by taste
Match what is in the mug to the next move you should make
Sour or thin
- Grind a little finer
- Or add 5 to 10 seconds of steep time
- Keep dose and water the same
Bitter or harsh
- Grind a little coarser
- Or shorten the steep slightly
- Do not force the press
Weak in milk
- Use 18 to 20 g coffee
- Keep brew water near 50 to 60 g
- Try Prismo or Flow Control
Outcome
Small changes tell you more than dramatic ones, and they waste fewer beans too.
Frequently asked questions
Can AeroPress make real espresso?
No. Real espresso uses about 9 bars of pressure, and AeroPress does not. What it can make is a strong espresso-style concentrate that works well on its own or in milk drinks.
What grind is best for an AeroPress espresso recipe?
Start fine, around table-salt texture. If the press feels impossible and tastes bitter, go a little coarser. If it rushes through and tastes sour, go a little finer.
What is the best AeroPress ratio for espresso-style concentrate?
A strong starting point is about 18 g of coffee to 55 to 60 g of water. That gives you a short, punchy concentrate you can drink straight, dilute, or mix with milk.
How do you fix a sour AeroPress espresso-style shot?
Change one thing at a time. First grind a little finer. If that does not fix it, add 5 to 10 seconds of steep time. Do not change grind, time, dose, and water all at once or you will learn nothing.
Is Prismo better than the Flow Control cap?
Prismo usually gives a heavier, fuller cup because of the metal filter and valve setup. The Flow Control cap is easier if you want a no-drip workflow and you still prefer paper-filter clarity.