
Best AeroPress for Hiking (2026): 6 Trail-Ready Picks
The best AeroPress for hiking is the AeroPress Go for most people. It packs into its own mug, cleans up fast, and feels like a real trail kit instead of a kitchen brewer you tossed into a backpack five minutes before leaving.
But here is the honest part: there are really only two main AeroPress brewers worth arguing about for hiking, the Go and the Original. After that, the conversation is mostly about what else you carry. A no-drip cap can make camp brewing way less annoying. Paper filters can save water and cleanup time. A grinder can make the cup better, but it also makes your pack heavier. So this page is built around the real decision, not fake variety.
The best AeroPress hiking setups, not just the best brewer
For trail coffee, the real choice is Go vs Original first, then which upgrades actually earn pack space
Overall
Best all-in-one trail kit
- Nests into its own mug
- Fast cleanup
- Easy to pack
- Simple for tired mornings
Top Pick AeroPress Go
$$
The easiest hiking-ready answer
Check Price on Amazon Ultralight
Best if grams bug you
- Lighter than the Go
- Bigger brew chamber
- Easy to strip down
- Great with paper filters
Top Pick AeroPress Original
$$
Less kit, less weight
Check Price on Amazon Value
Best cheap setup upgrade
- Stops drip-through
- Works with paper or metal
- Makes camp brewing less messy
- Cheaper than buying a second brewer
Top Pick Flow Control Cap
$
The smartest low-cost add-on
Check Price on Amazon Flavor
Best for richer cups
- Reusable metal filter
- No-drip immersion
- Fuller body
- Great for camp milk drinks
Top Pick Fellow Prismo
$$
More body, more fuss
Check Price on AmazonQuick answer: Buy the AeroPress Go if you want the easiest hiking setup with the fewest loose parts. Buy the AeroPress Original if you are going lighter and do not care about the nesting mug. And if you already own either brewer, the AeroPress Flow Control Filter Cap is the best value upgrade because it makes steep-and-press brewing calmer when your campsite table is crooked and the wind is being rude.
My blunt take? Trail coffee should feel like a treat, not a puzzle box. The Go is the one I would hand most hikers without a long speech. The Original is the one I would hand the friend who trims toothbrushes and knows exactly how much their rain shell weighs. If that sounds a bit intense, congratulations, you are probably the normal target for the Go.
Quick picks
Our Top Picks

Comparison table
| Pick | Packed weight | Cup output | Cleanup effort | Filter system | Trail durability | Link |
|---|---|---|---|---|---|---|
| AeroPress Go Portable Coffee Maker | 11.4 oz packed kit | About 8 oz per brew | Very easy | Paper by default, metal optional | Excellent for travel and camp use | Check Price |
| AeroPress Original Coffee Press | 7.75 oz with core parts | About 10 oz per brew | Very easy | Paper, Prismo, or Flow Control | Very good, especially stripped down | Check Price |
| AeroPress Flow Control Filter Cap | Small add-on, roughly 2.5 oz | Depends on brewer | Easy rinse | Works with paper or metal | Good, simple plastic add-on | Check Price |
| Fellow Prismo Attachment | Small add-on, about 2 oz | Depends on brewer | Moderate rinse | Reusable metal filter included | Good, but one more part to track | Check Price |
| TIMEMORE Chestnut C2 Manual Grinder | About 15.2 oz / 430 g | Enough for 1 to 2 cups | Moderate | Pairs with any AeroPress setup | Very good metal build | Check Price |
| AeroPress Paper Micro-Filters | Almost nothing for a trip stash | Depends on brewer | Easiest of all | White paper micro-filters | Great if kept dry in a bag | Check Price |
How we evaluate
For hiking, I care about four things first: portability, brew consistency, cleanup speed, and accessory footprint. Portability is obvious. If the setup feels like carrying a little kitchen on your back, it is probably not the right hiking setup.
Brew consistency matters because bad trail coffee feels extra disappointing. You hiked for the view. You woke up cold. You finally get hot water going. Then the cup tastes like sad brown rainwater. Good gear should help you avoid that, even when the table is shaky and your pour is not exactly graceful.
Cleanup speed matters more outside than it does at home. Paper filters win here because they are almost comically easy. Pop the puck, quick wipe, done. Metal filters can make a richer cup, more like broth compared with paper's tea-like clarity, but they ask for more rinsing and a little more patience.
Individual product reviews
1) AeroPress Go Portable Coffee Maker — Best Overall
The AeroPress Go is the best pick for most hikers because it solves the boring problems before they become annoying. It packs into its own mug, keeps the small pieces together, and feels tidy in a way the Original never quite does unless you build your own little system around it.
On a trail morning, that matters. You want to unpack, brew, drink, rinse, and move on. The Go feels like it was built for that rhythm. It is not the lightest option, but it is the one that makes the whole routine feel easiest when your hands are cold and your brain is still waking up.
Pros
- ✓ Nests into a compact travel mug
- ✓ Very easy cleanup with paper filters
- ✓ Best all-in-one answer for most hikers
Cons
- ✗ Heavier than a stripped-down Original setup
- ✗ Smaller brew size than some people want
2) AeroPress Original Coffee Press — Best Ultralight Pick
If you care about weight first, the Original is still the smarter buy. It comes in lighter than the Go, gives you a bit more chamber room, and lets you build a lean setup around exactly what you want instead of carrying the nesting mug whether you need it or not.
The trade-off is convenience. The Original feels a little more like a parts collection and a little less like a ready-made trail kit. That is no big deal if you already like dialing in your pack. But if you want grab-and-go simplicity, the Go wins without much debate.
Pros
- ✓ Lighter than the Go
- ✓ Slightly larger brew capacity
- ✓ Easy to pair with your own mug and filter stash
Cons
- ✗ Not as tidy to pack
- ✗ Needs more thought to feel trail-ready
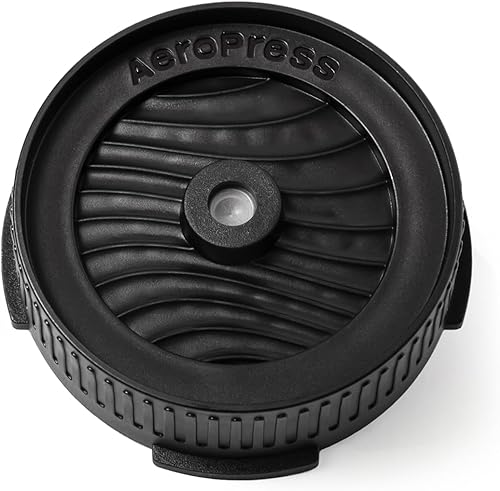
3) AeroPress Flow Control Filter Cap — Best Value Setup
This is the add-on I would tell most current AeroPress owners to buy before buying a whole second brewer. The Flow Control cap stops the early drip, lets you steep more calmly, and keeps the brewing process from feeling like a race against gravity.
It is especially nice outdoors, where wind, uneven tables, and distracted camp chatter make precise pouring less realistic. You still get to keep paper filters if you want that cleaner cup, and that makes it easier to recommend than a more flavor-changing accessory.
The only real catch is compatibility: it fits the standard AeroPress family, but AeroPress says some pre-2014 Original brewers are not a good match. Check that before you click buy.
Pros
- ✓ Cheap way to improve a hiking setup
- ✓ Works with paper or metal filters
- ✓ Makes immersion brewing less messy
Cons
- ✗ Not recommended for some older Original brewers
- ✗ Still one more piece to carry
4) Fellow Prismo Attachment for AeroPress — Best for Richer Camp Cups
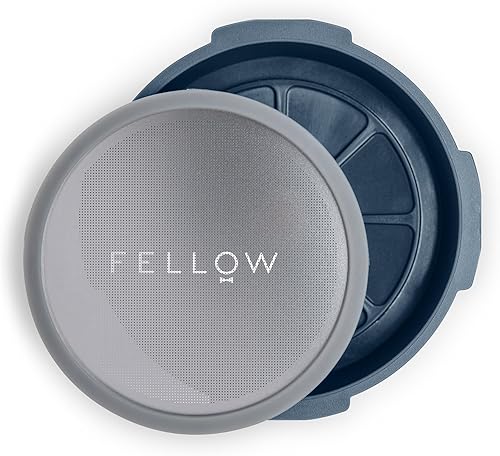
The Prismo is the trail pick for people who want a fuller, heavier cup and do not mind a little more cleanup. Because it includes a reusable metal filter, the coffee comes out thicker and rounder. Think orange juice with some pulp instead of filtered apple juice.
I like it most for car camping, cabin trips, or shorter hikes where you want richer coffee and are not counting every gram. For fast-and-light backpacking, it is harder to call essential. It improves the cup, but it also adds another part and another rinse step.
Pros
- ✓ Great for richer coffee on camp mornings
- ✓ Built-in reusable metal filter
- ✓ No-drip immersion feels easy to use
Cons
- ✗ More cleanup than paper filters
- ✗ Less appealing for strict ultralight packs
5) TIMEMORE Chestnut C2 Manual Grinder — Best Grinder for Real Beans

Fresh grinding on the trail sounds romantic until you remember that metal burrs also weigh something. The Chestnut C2 is here because it is one of the few manual grinders that feels sturdy enough for travel and good enough to make the extra weight feel justified.
It gives you more even grounds than cheap travel grinders, which means a cup that tastes less muddy and less split between sour and bitter. On a weekend backpacking trip, I would only carry it if coffee quality is part of the fun for you. On a day hike or quick overnight, good pre-ground beans are often the saner choice.
Pros
- ✓ Better grind quality than flimsy travel grinders
- ✓ Metal body handles rougher use
- ✓ Makes the most sense for longer trips
Cons
- ✗ Heavier than most hikers want
- ✗ Adds time to the morning routine
6) AeroPress Paper Micro-Filters (700 Count) — Best Cheap Trail Essential

Best Cheap Trail Essential
AeroPress Paper Micro-Filters (700 Count)
Check price
Check Price on AmazonThese are not exciting. They are just smart. Paper filters weigh almost nothing, make cleanup ridiculously easy, and give you the cleanest cup on the list. On a hike, that combination is hard to beat.
This is also the easiest place to save yourself from a dumb mistake. Pack a trip-sized stack in a small zip bag and forget about it. Running out of filters on day two feels silly in exactly the way bad trail planning usually does.
Pros
- ✓ Featherlight to pack
- ✓ Fastest cleanup of any option here
- ✓ Keeps cups bright and low-silt
Cons
- ✗ Disposable
- ✗ Does not give the richer body some campers want
Brew workflow for field conditions
How to make AeroPress coffee when the campsite is messy
A trail routine that still works in wind, with limited water, and on surfaces that wobble like bad restaurant tables
Step 1 Set up smart
- Pick the flattest surface you can find
- Pre-stage filter, cap, and mug
- Keep loose parts in one pocket or bowl
Step 2 Brew steady
- Use moderate water pours
- Avoid splashy aggressive stirring
- Let the brewer do the work
Step 3 Press slow
- Press with two steady hands
- Keep the mug planted
- Stop when the hiss starts
Step 4 Clean fast
- Pop the puck
- Wipe or quick-rinse the cap
- Pack parts before they wander off
Result
A better cup with less mess, less wasted water, and less chance of chasing your stirrer across camp
The big mistake outdoors is trying to brew like you are at home. At home, you can fuss. On a picnic table with wind pushing steam sideways, simple wins. That is why the Go, paper filters, and the Flow Control cap all score so well here. They make the routine more forgiving.
Pack-list mini section: what to carry and what can stay home
Core kit
- One brewer: AeroPress Go or AeroPress Original
- Paper filters packed in a dry bag or filter holder
- Coffee pre-dosed for the trip or one compact grinder if you really want it
- A mug or the Go travel cup
Optional add-ons
- Flow Control cap if you want a calmer steep outdoors
- Prismo if richer coffee matters more than the extra cleanup
- Small scale only if you care about repeating the same recipe exactly
- Brush or cloth if you are bringing a grinder for multiple days
If you are wondering where to cut weight, cut duplicate gear first. You do not need both the Go and the Original. You probably do not need a grinder on a casual overnight. And you definitely do not need fancy extras if your real goal is simply a hot, good cup after a long climb.
Frequently asked questions
What is the best AeroPress for hiking overall?
For most hikers, the AeroPress Go is the best overall choice because it packs into its own mug and keeps the whole routine tidy. If you care more about shaving weight than having a nesting cup, the AeroPress Original is the smarter ultralight pick.
Is the AeroPress Go better than the AeroPress Original for backpacking?
Usually for convenience, yes. Usually for weight, no. The Go is the nicer all-in-one travel kit, while the Original is lighter and gives you a little more brew room if you do not mind building your own setup around it.
Are paper or metal filters better for hiking?
Paper filters are lighter, cleaner, and easier to live with on the trail. Metal filters make a fuller cup and save waste, but they also need a better rinse and can leave more silt in the last sip.
How do you clean an AeroPress while hiking?
The easy version is still the best version: press out the puck, wipe the cap if needed, and give the parts a quick rinse. Paper filters make this almost laughably simple. Metal filters take a little more water and a little more patience.
Do you need to carry a grinder for hiking coffee?
Not always. If you are on a short trip, good pre-ground coffee is totally fine. A manual grinder makes more sense on longer trips, for fresher beans, or when you care enough about cup quality to carry the extra weight.
Related guides
- Best AeroPress Go recipe if you already own the Go and want an easy trail-friendly brew to copy.
- Best AeroPress brew time if your camp cups keep landing bitter, weak, or oddly sour.
- Best AeroPress brewing method if you are deciding between simple standard brews and richer immersion-style recipes.
- Coffee brewing ratio guide if you want to stop guessing and make better cups with less wasted coffee.