Best Coffee Grind Size for Espresso (2026): Dial-In Guide
The best coffee grind size for espresso is fine enough to slow the shot down and build sweetness, but not so fine that your machine starts choking like it is trying to sip a milkshake through a cocktail straw. In real life, that means starting near table-salt fine, then nudging your burr grinder based on how the shot tastes and flows.
How to Dial In Espresso Without Wasting Half a Bag
Keep the recipe steady, listen to what the shot is telling you, then make tiny grind moves
Step 1 Start Here
- Dose 18g coffee
- Aim for 36g espresso out
- Use the same puck prep
- Keep water temp steady
Step 2 Watch the Shot
- Time the flow
- Taste for sour or bitter notes
- Look at body and crema
- Ignore one weird fluke shot
Step 3 Move the Grinder
- Fast and sour means finer
- Slow and bitter means coarser
- Change one click or tiny nudge
- Pull again right away
Step 4 Lock It In
- Write down the setting
- Note bean age
- Brush the grinder weekly
- Adjust again as the coffee ages
Result
Sweeter shots, less guesswork, and way fewer sink shots on busy mornings.
Quick answer
Start fine, then adjust by taste. If your shot runs fast and tastes sour or thin, go a little finer. If it runs slow and tastes bitter, dry, or harsh, go a little coarser. Keep your dose and yield the same while you adjust, or you will end up chasing your own tail.
A simple starting point is 18 grams of coffee in, 36 grams of espresso out, in around 25 to 32 seconds. That is not magic. It is just a stable place to begin so your grinder setting makes sense from shot to shot.
What you'll need
You do not need a science lab here. You need fresh beans, a burr grinder that can grind fine enough for espresso, a scale, and enough patience to change one thing at a time. That last part matters more than people think.
If you are still shopping, our best burr grinder for espresso guide is the place to start. If you want a cheaper manual option, read best hand grinder for espresso under $100. And if your ratios feel messy, our coffee brewing ratio guide will make the whole process feel less chaotic.
| Grinder | Best for | Adjustment style | Why it helps | |
|---|---|---|---|---|
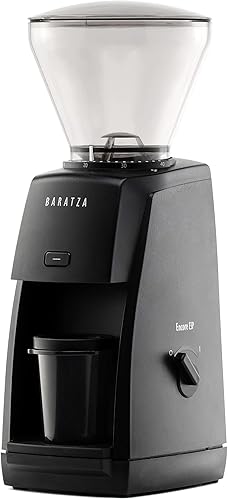
| Baratza Encore ESP | First home espresso setup | Stepped espresso range | Easy to understand. One click feels like one real move, which is great when you are learning what a shot is telling you. | Check Price |
| Fellow Opus | Small counters and mixed brewing | Stepped plus inner micro adjust | Compact and flexible. A little fiddly at first, but it gives you more room to fine-tune than many entry grinders. | Check Price |
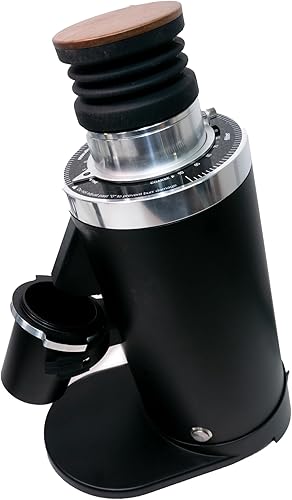
| DF64 Gen 2 | Tiny flavor-focused adjustments | Stepless collar | This is the pick when one click feels too big and you want to sneak into the sweet spot instead of jumping over it. | Check Price |
Our Top Picks

Step-by-step: how to find the best coffee grind size for espresso
1. Pick one boring baseline and stick to it
This is the least sexy part, but it is the part that saves coffee. Start with 18 grams in and 36 grams out. Use the same basket. Use the same tamp. Use the same puck prep, which just means how you distribute and press the grounds before brewing. Keep your water temperature steady too. If you keep changing the whole routine, you will never know whether the grinder fixed the shot or something else did.
Think of it like seasoning soup. If you change the salt, the heat, the pot, and the cooking time all at once, you cannot tell what helped. Espresso is the same game. Set one stable baseline first. Then the grinder starts giving you useful feedback instead of noise.
2. Pull one shot and pay attention to what you actually taste
Do not stare at the timer like it is the only thing that matters. Watch the shot, yes, but taste it too. A fast shot that tastes bright in a good way can still be close. A shot that runs in the right time but tastes flat, bitter, or hollow is not a win just because the stopwatch said so.
Here is the simple cheat sheet. If the shot gushes out fast and tastes sharp, sour, or watery, your grind is probably too coarse. If it crawls out slowly and tastes bitter, dry, or kind of ashy, it is probably too fine. You are listening for the cup, not just the clock.
3. Make tiny grinder moves, not dramatic ones
This is where people burn through beans. They panic after one bad shot and swing the grinder way too far. Then the next shot is bad in the opposite direction. Then they swing it back. Welcome to espresso ping-pong.
Do the opposite. On a stepped grinder, move one click. Maybe two if the shot was wildly off. On a stepless grinder, make a tiny nudge. Tiny means tiny. If the last shot ran like apple juice and tasted sour, go finer. If it dripped like cold honey and tasted bitter, go coarser. Pull again immediately and keep the same recipe.
The closer you get, the smaller your moves should be. This is usually where sweetness shows up. The shot starts tasting rounder, the body gets silkier, and the finish stops feeling sharp or dusty. That is the zone you are looking for.
4. Learn the look and feel of a good espresso shot
A balanced shot usually starts slow, then settles into a steady stream. The texture looks syrupy, not splashy. The crema sits on top like a thin caramel blanket, not a giant foamy cap that disappears in ten seconds. In the cup, you want sweetness first, some pleasant bitterness after, and enough body that it does not feel thin on your tongue.
If you are new to espresso, stop trying to name twenty tasting notes. You do not need to say cherry, hazelnut, orange peel, and dark cocoa on day one. Just ask: is this sour, bitter, sweet, thin, or balanced? That is enough to guide the next grinder move.
5. Expect the setting to drift as the beans change
This surprises a lot of people. You finally dial in a bag on Monday, then by Thursday the same setting runs faster. Nothing is broken. Your coffee changed. Beans release gas as they rest, and that changes how water moves through the puck.
Usually the fix is small. Maybe a click finer. Maybe a tiny nudge. Humidity can push things around too, especially if your kitchen swings from dry air to sticky air. Espresso is a moving target. The goal is not finding one sacred setting forever. The goal is knowing how to get back to the sweet spot fast.
The Fast Correction Loop
When a shot goes sideways, use this before you start changing dose or blaming the machine
Step 1 Fast + Sour
- Go a little finer
- Keep dose the same
- Pull again right away
Step 2 Slow + Bitter
- Go a little coarser
- Leave yield alone
- Taste the next shot
Step 3 Close but Not Sweet
- Make a tiny move only
- Watch body and finish
- Stop when sweetness shows up
Result
Cleaner decisions, less bean waste, and fewer wild over-corrections.
6. Write the setting down like it matters, because it does
The easiest way to get faster at espresso is keeping a tiny log. Bean name. Roast date if you know it. Grinder setting. Dose. Yield. Shot time. One or two words about taste. That is it.
Do not overcomplicate this. You are not writing a tasting journal for a coffee competition. You are building your own shortcut list. Next time you buy that same bag, you do not start from zero. You start near the last good setting and save yourself three frustrating shots.
Common mistakes that make espresso feel harder than it is
Changing three things at once
This is the big one. If you change grind size, dose, and yield on the same shot, you learn nothing. Pick one lever. For most espresso problems, grind size is the first lever to pull.
Grinding too coarse because you are afraid of choking the machine
A lot of beginners stay way too coarse. The shot runs fast, tastes sour, and they assume espresso is just supposed to be harsh. It is not. If the cup tastes thin and sharp, trust that you probably need to go finer.
Going too fine and calling bitterness “strength”
A shot can be intense and still be bad. If it tastes dry, rough, or kind of burnt at the end, your grinder may be too fine. Strong is good. Ashtray is not.
Ignoring grinder cleanliness
Old grounds and coffee oils build up fast, especially if you pull espresso every day. That stale residue can make your results feel random. If the grinder is dirty, the setting stops being honest. Our how to clean a burr coffee grinder guide is worth doing before you start blaming your beans or machine.
Expecting one setting to work for every roast
Light roasts often want a finer setting. Darker roasts usually like a slightly coarser one. Medium roasts are often the easiest place to find your footing. If you jump between coffees a lot, expect the grinder to move with them.
Troubleshooting shots that taste wrong
If your shot is sour and fast: go finer. Sour espresso often tastes lemony, thin, and a little empty in the middle. The flow may look quick and loose, and the crema can feel pale and short-lived. Tighten the grind first before touching anything else.
If your shot is bitter and slow: go coarser. This kind of shot usually drags out, tastes heavy in a bad way, and leaves a dry finish that hangs around too long. It can look dark and syrupy, but that does not mean it is good. Ease the grinder back a little.
If the shot time looks okay but the cup still tastes dull: make a tiny adjustment, not a big one. Sometimes you are close and just need to move a hair finer or coarser to bring out sweetness. This is where stepless grinders feel especially nice, but you can still get there on stepped grinders with patience.
If every shot seems inconsistent: check the boring stuff. Are you dosing the same amount every time? Are you tamping level? Is the grinder full of stale grounds? Is the coffee very fresh or getting old? Most “my grinder is broken” moments turn out to be one of those four things.
If you switch beans and everything falls apart: that is normal. Start from your old setting as a rough reference, then adjust from there. A bright light roast and a dark chocolatey blend are not going to want the same treatment. One will ask for finer. The other may punish you for it.
How different grinder styles change the dial-in feel
A stepped grinder feels like climbing a staircase. Each move is obvious. That is great when you are learning because you can repeat it easily. The downside is that sometimes one step is a little too coarse and the next one is a little too fine. You end up choosing which side of the fence tastes better.
A stepless grinder feels more like sliding a dimmer switch. You can sneak into the sweet spot with tiny moves. That is lovely when you are chasing the last little bit of sweetness or trying to tame a picky light roast. The downside is that it is easier to overshoot if you are heavy-handed, and it is not always as beginner-friendly.
Honestly, most home brewers do not need to obsess over this forever. If you want the easiest learning curve, go stepped. If you already know you are the kind of person who will happily fuss over tiny differences in flavor, stepless starts making more sense.
A simple weekly routine that keeps your grinder honest
Daily: tap out old grounds, brush the chute if you can, and wipe away oily residue. It takes almost no time. It also keeps yesterday's stale coffee from sneaking into today's shot.
Weekly: remove the hopper if your grinder allows it and dry-brush the upper burr area. You are not doing surgery here. You are just clearing out the dusty corners where fines like to hide.
Monthly: do a deeper clean based on the maker's instructions. After that, expect the first shot or two to shift a bit. A clean grinder often behaves a little differently, which is actually a good sign. It means the old buildup is gone.
My honest rule of thumb
If I had to give one piece of advice over the kitchen counter, it would be this: stop searching for a perfect number and start learning the pattern. Fast and sharp means finer. Slow and harsh means coarser. Close but not sweet means a tiny move. That pattern will help you more than any random dial number somebody posted online.
Espresso gets easier the moment you treat it like feedback instead of failure. The shot is always telling you something. Once you know how to listen, your burr grinder settings stop feeling mysterious and start feeling useful.
Frequently asked questions
How fine should espresso grind be?
Think table salt, but not powder. Espresso needs a grind that is fine enough to slow the water down, yet not so fine that the shot chokes and drips like honey from a cold bottle.
What shot time should I aim for first?
A good starting point is about 25 to 32 seconds for 18 grams in and roughly 36 grams out. It is a starting line, not a law. Taste still matters more than the timer.
Why does the same setting stop working after a few days?
Because coffee changes. Beans release gas as they age, humidity shifts, and grinders hold onto old grounds. It is normal to move a little finer or coarser through the week.
Should I change dose before grind size?
Usually no. Change grind size first so you can actually tell what fixed the shot. If you move dose, yield, and grind all at once, you are basically guessing.