
Best AeroPress Coffee Method (2026): 5 Brew Styles Compared
The best AeroPress coffee method for most people is still the classic standard brew. It is clean, forgiving, and easy to repeat before your brain is fully online.
That said, “best” changes fast once you know what kind of cup you actually want. Some methods make a brighter, cleaner mug. Some lean thicker and punchier. Some are just easier when you are brewing in a hotel room with one outlet and a suspicious kettle. The trick is not finding the fanciest recipe. It is finding the method you will happily use again tomorrow.
Best AeroPress Methods for Real Morning Coffee
Pick your brew style by flavor, strength, and how much fuss you want before the caffeine hits
Overall
Best if you want one easy method that rarely disappoints
- Clean paper-filter cup
- Easy to troubleshoot
- Fast cleanup
- Great daily starting point
Top Pick AeroPress Original
$$
The best all-around method
Check Price on Amazon Body
Best if you want a thicker, richer cup
- No early drip-through
- Full immersion brew
- Great with medium and dark roasts
- Richer mouthfeel
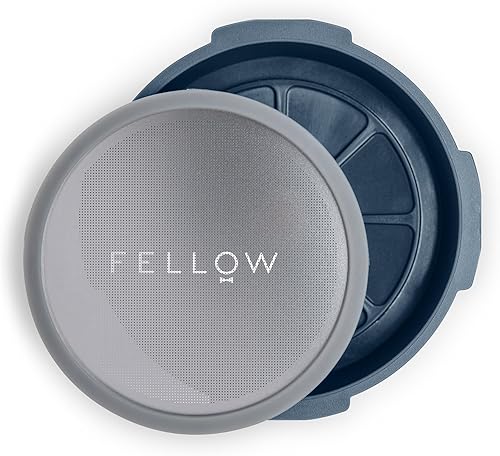
Top Pick Fellow Prismo
$$
The fuller-bodied option
Check Price on Amazon Strong
Best if you like punchier mugs or milk drinks
- Concentrate then dilute
- Cleaner than inverted brewing
- Easy strength control
- Good for larger mugs
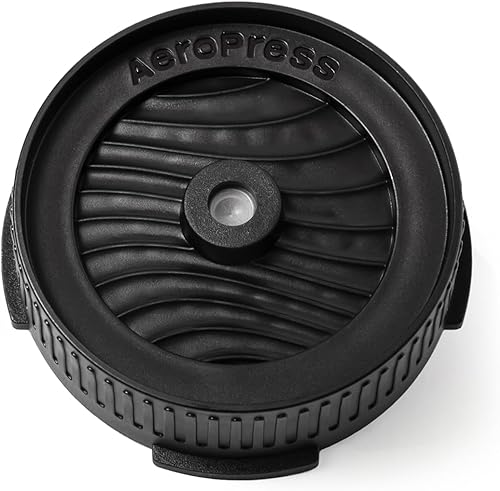
Top Pick Flow Control Cap
$
The strongest practical method
Check Price on Amazon Travel
Best if your kitchen changes every week
- Compact all-in-one kit
- Less mess in small spaces
- Simple repeatable ratio
- Easy hotel and office setup
Top Pick AeroPress Go
$$
The easy portable method
Check Price on AmazonQuick answer: start with the classic standard method on the AeroPress Original if you want the safest all-around win. If you want more body, switch to a no-drip full-immersion method with the Fellow Prismo. If you want the strongest mug or a better base for milk drinks, use a concentrate plus bypass method with the Flow Control Cap. For beginners, though, the plain standard method is still the one I would hand you first.
Quick picks
Our Top Picks
Comparison table
| Method | Best for | Coffee | Water | Grind | Brew time | Press style | Flavor profile | |
|---|---|---|---|---|---|---|---|---|
| Classic standard | Most people, most mornings | 15g | 240g | Medium-fine, like table salt | 1:45 total | Gentle straight press | Clean, sweet, balanced | Check Price |
| No-drip full immersion | More body without inverted mess | 16g | 220g | Medium-fine | 2:00 total | Gentle press after full steep | Richer and heavier | Check Price |
| Concentrate plus bypass | Stronger mugs and milk drinks | 18g | 140g brew + 80g bypass | Medium-fine | 1:30 total | Press short concentrate, then dilute | Dense and punchy | Check Price |
| Light-roast clarity | Cleaner brighter cups | 15g | 250g | Medium-fine, slightly finer than daily | 2:00 total | Steady gentle press with paper filter | Crisp and lively | Check Price |
| Travel-friendly standard | Hotels, offices, campsites | 14g | 210g | Medium-fine, forgiving | 1:40 total | Simple direct brew | Balanced with low mess | Check Price |
How we evaluate
I care about four things here: how repeatable the method is, how good the cup tastes, how annoying it is to clean up, and how much special gear it quietly demands. A recipe can sound clever online and still be a pain when you are half-awake and trying not to spill coffee on the counter. That is not a great method. That is a hobby project.
Repeatability came first because AeroPress is at its best when it feels easy. If a method only works when your grind is perfect, your pour is perfect, and the moon is in the right phase, it is not the best method for most people. I also looked at cup style on purpose. Some readers want brightness and clarity. Some want something closer to a short strong brew. Some just want a fast cup that tastes good in a hotel room. Those are different jobs, so they need different answers.
Best AeroPress methods reviewed
1) Classic standard method with AeroPress Original Coffee Press — best overall
This is the method I would hand almost anyone first. Use about 15 grams of coffee, pour 240 grams of water, give it a quick stir, wait roughly 90 seconds, then press gently. The cup lands in a really friendly place: sweet, clean, and balanced. Not watery. Not muddy. Just good coffee without any circus tricks.
The big reason this method wins is that it teaches you what went wrong when a cup tastes off. If it comes out sour, grind a little finer or steep a little longer. If it tastes bitter, ease the water temperature down or back off the grind. It is like learning to drive in a normal car instead of a race car. You notice the basics faster, and you crash a lot less.
Pros
- ✓ Easy to learn and even easier to repeat
- ✓ Clean cup with very little grit or sludge
- ✓ The best method for figuring out your coffee and grinder
Cons
- ✗ Not the thickest or boldest AeroPress cup
- ✗ Can feel a little light if you mostly drink milk-based coffee
2) No-drip full-immersion method with Fellow Prismo — best for fuller body
If the standard method tastes a little too clean or a little too polite for you, Prismo is the easiest next move. It stops the coffee from dripping through before you are ready, so the brew gets a proper full steep. The cup comes out thicker and heavier, more like whole milk than skim milk. That extra body is the whole point.
I like this method best with medium roasts and with people who want a stronger-feeling cup without flipping the brewer upside down like a tiny hot lava lamp. You do lose a bit of that paper-filter sparkle, and the metal filter lets more texture through, but that is the trade. Less brightness, more weight. If that sounds good to you, this method makes a lot of sense.
Pros
- ✓ More body with less early drip-through
- ✓ Cleaner and calmer than the inverted method
- ✓ Great if you like richer cups or smaller stronger brews
Cons
- ✗ Adds another part to clean
- ✗ Not as crisp and bright as paper-only brewing
3) Concentrate plus bypass with AeroPress Flow Control Filter Cap — best strong method
This is the method I reach for when I want something punchier without over-steeping the coffee into a bitter mess. You brew a short concentrate, then add bypass water after the press until the strength lands where you want it. That gives you way more control than simply stuffing in extra coffee and hoping for the best. It is also a much nicer path to milk drinks than a standard full mug.
The Flow Control Cap makes this easier because it keeps the brew from leaking out too early. That means you can work with a stronger ratio and still stay in control. Think of it like making a strong stock and then seasoning it to taste. You are building something concentrated first, then stretching it carefully instead of watering down a finished cup by accident.
Pros
- ✓ The best method here for stronger mugs and milk drinks
- ✓ Lets you tune final strength after brewing
- ✓ Lower mess than improvising inverted recipes
Cons
- ✗ Less forgiving than the classic daily method
- ✗ A sloppy bypass pour can flatten the cup fast
4) Light-roast clarity method with AeroPress paper filters — best for cleaner flavor

If you like lighter roasts, floral coffees, or anything with citrusy brightness, paper filters are still your friend. They clean a lot of the heavier oils and fines out of the cup, so the coffee tastes clearer and more defined. Instead of one big generic “coffee” note, you get a cup where sweetness, fruit, and acidity are easier to tell apart.
This is also a smart fix when your AeroPress cups keep tasting muddy. Muddy usually means too much texture and not enough separation between flavors. Paper filters trim that down fast. The result feels more like a clean pour-over cousin than a thick little press brew. Not everyone wants that. But if you are chasing clarity, this method is the one I would trust first.
Pros
- ✓ The cleanest and brightest method in this guide
- ✓ Great for light roasts and subtle coffees
- ✓ Easy cleanup and very little sediment in the cup
Cons
- ✗ Can feel too light if you love heavy-bodied coffee
- ✗ Less ideal for strong milk-drink bases
5) Travel-friendly standard method with AeroPress Go — best for brewing away from home

Travel coffee needs a different kind of “best.” At home, you can chase tiny upgrades. On the road, the best method is the one you can pull off half-awake with limited counter space and whatever weird kettle your hotel gave you. That is why the AeroPress Go version of the standard method works so well. It keeps the routine simple, compact, and low drama.
I would keep the recipe boring on purpose here: about 14 grams of coffee, 210 grams of water, short stir, short steep, gentle press. Fancy travel methods usually sound better than they taste. Good travel coffee comes from cutting friction, not adding it. The Go nails that. It makes it much more likely that you actually brew the coffee instead of giving up and buying something disappointing downstairs.
Pros
- ✓ Compact all-in-one setup that fits real travel routines
- ✓ Easy cleanup in small sinks and office kitchens
- ✓ Keeps the AeroPress workflow familiar and forgiving
Cons
- ✗ Not ideal if you need large mugs fast
- ✗ Travel grinders and bad kettles still limit consistency
Pick your method by the cup you want
If you keep hopping from one AeroPress recipe to another, stop thinking in terms of “best recipe ever” and start thinking in terms of cup goal. Do you want brightness? More body? A stronger base for milk? A travel method that still tastes like coffee instead of compromise? Once you answer that, the method usually gets pretty obvious.
The other trap is changing three things at once. That is how perfectly good brewers end up getting blamed for bad cups. Keep the dose steady, keep the water steady, then change one variable. AeroPress rewards boring discipline more than clever chaos.
Choose the method that fits your mood
These are the five lanes that actually matter in day-to-day AeroPress brewing
Clean and easy
- Use the classic standard method
- Best for most beans and most people
- The easiest place to learn what changed
Thicker cup
- Use a no-drip full-immersion method
- Best if standard tastes a little thin
- Great with medium and darker roasts
Stronger mug
- Brew concentrate then add bypass water
- Best for milk drinks or punchier cups
- Measure the bypass if you want repeatable results
Portable routine
- Use the AeroPress Go standard recipe
- Keep the process simple on purpose
- Good coffee beats travel coffee theatrics
Outcome
You stop chasing random internet recipes and start using the method that actually matches your taste and routine
How to fix a bad cup fast
If your cup tastes sour, the coffee is usually under-extracted. That just means the water did not pull enough flavor out of the grounds. Grind a little finer, steep a little longer, or use slightly hotter water. Do not change all three unless you enjoy confusion.
If your cup tastes bitter, back off instead of pushing harder. Grind a touch coarser, shorten the steep, or lower the water temperature. Dark roasts especially can go from chocolatey to ashtray fast. If that keeps happening, the paper-filter clarity method usually fixes it quicker than another gadget will.
If the coffee tastes muddy, it is often a filter and grind problem, not a dose problem. That is where good paper filters and a more even grinder help. Our AeroPress grind size guide is the next read if your cups keep swinging between harsh and dull.

Frequently asked questions
What is the best AeroPress coffee method for most people?
The classic standard method is still the best starting point for most people. It gives you a clean, balanced cup, it is easy to repeat, and when something tastes off, it is much easier to figure out why.
Is the inverted AeroPress method actually better?
Not usually. It can make a good cup, but it is fussier and easier to mess up. A no-drip accessory like Prismo or the Flow Control Cap gives you most of the same full-immersion benefit with less risk of wearing hot coffee.
What grind works best for AeroPress methods?
Most AeroPress methods land around medium-fine, roughly like table salt. Stronger concentrate brews can go a touch finer, while looser dark-roast brews often taste better a little coarser.
How do I stop my AeroPress coffee from tasting bitter?
Back off one step at a time. Lower the water temperature a little, grind slightly coarser, or shorten the steep. Bitter AeroPress coffee usually comes from pushing dark roasts too hard, not from the brewer itself.
What AeroPress method is best for travel?
A simple standard recipe in the AeroPress Go is the best travel method for most people. It keeps the routine compact, low-mess, and easy to repeat even when the kettle, sink, and counter space are all a little weird.
Related guides
- Best AeroPress brewing method for a broader look at method styles and who each one suits.
- Best AeroPress coffee ratio if you want exact grams and stronger starting points.
- Best AeroPress grind size if your press feels too easy, too hard, or your cup tastes muddy.
- Best AeroPress brew temp if bitterness keeps ruining darker roasts.
- Best AeroPress bypass recipe if you want bigger mugs without a watered-down finish.