
Best AeroPress Coffee Recipe (2026): 5 Methods Compared
The best AeroPress coffee recipe for most people is still the simple standard one: 15 grams of coffee, 240 grams of water, a medium-fine grind, and a gentle press at around the 90-second mark. It gives you a cup that tastes sweet, balanced, and clean enough to understand what to change next instead of leaving you guessing.
Best AeroPress recipes for actual mornings
Pick the method by cup style, strength, and how much hassle you can tolerate before coffee
Everyday
Sweet, clean, and hard to mess up
- 15g coffee to 240g water
- Medium-fine grind
- 90 sec steep
- Best daily starting point
Top Pick AeroPress Original
$
Best all-around recipe
Check Price on Amazon Clarity
Brighter light-roast cups with less muddiness
- Paper-filter clean finish
- Great for floral beans
- Easy cleanup
- Sharpest flavor separation
Top Pick Paper Micro-Filters
$
Best for cleaner cups
Check Price on Amazon Strength
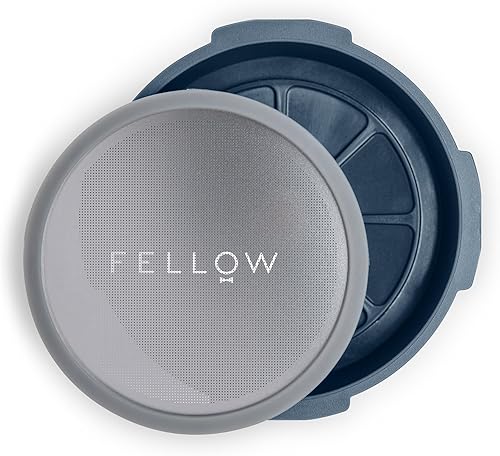
Punchier body without sloppy inversion drama
- No-drip immersion
- Better for bypass brews
- Denser concentrate
- Works well with milk
Top Pick Fellow Prismo
$$
Best for stronger brews
Check Price on Amazon Travel
Compact setup that still makes a legit cup
- Cup stores the brewer
- Fast sink cleanup
- Easy hotel routine
- Low-mess mornings
Top Pick AeroPress Go
$$
Best portable recipe kit
Check Price on AmazonQuick answer: start with the classic daily recipe if you want the easiest, most repeatable cup. If you want a stronger concentrate for milk drinks, use a no-drip setup like the Prismo. If you mainly brew light roasts, paper filters give you the clearest cup. And if your AeroPress mostly lives in a backpack or office drawer, the AeroPress Go keeps the whole thing simple.
Quick picks
Our Top Picks

Comparison table
| Recipe | Best For | Dose / Water | Grind | Agitation | Brew Time | Press Style | Flavor Profile | |
|---|---|---|---|---|---|---|---|---|
| Balanced daily standard | Most people and most coffees | 15g / 240g | Medium-fine, like table salt | Quick stir or swirl | ~90 sec total | Standard, slow and steady | Sweet, balanced, clean | AeroPress Original |
| Inverted-style full-body | More body with less early drip | 16g / 230g | Medium-fine | One short stir after full pour | 1:45 steep, 25 sec press | No-drip immersion, gentle press | Rounder, thicker, fuller | Flow Control Cap |
| Light-roast clarity | Brighter beans and cleaner finish | 15g / 250g | Medium-fine, a touch finer if needed | Small swirl only | 1:45 to 2:00 total | Standard with paper filter | Bright, crisp, less muddy | Paper Filters |
| Strong concentrate + bypass | Punchier cups and milk drinks | 18g / 120g then top up | Medium-fine to fine | Short stir after pour | 75 to 90 sec steep | No-drip immersion, then dilute | Dense, bold, flexible | Prismo |
| Travel-friendly AeroPress Go | Hotel, office, camping | 15g / 220 to 240g | Medium-fine | Quick stir | ~90 sec total | Standard, compact setup | Balanced and forgiving | AeroPress Go |
How we evaluate
The first thing I care about is repeatability. A recipe can look clever on Instagram and still be useless on a sleepy Tuesday. If a method gives you one great cup and then three weird ones, that is not the best AeroPress coffee recipe. It is just a good accident.
After that, I look at cup quality, ease of execution, and cleanup friction. Cup quality is obvious: does it taste sweet, clear, and balanced, or does it land sour, bitter, or muddy? Ease of execution matters because some methods are calm and forgiving while others feel like balancing a hot science project over the sink. Cleanup matters too. The best recipe is the one you will actually keep brewing.
Best recipes reviewed
1) Balanced daily standard recipe — best overall
This is the recipe I would hand almost anyone first, because it makes sense fast. Start with 15 grams of coffee, pour 240 grams of water, give it a quick stir or swirl, steep to around 90 seconds total, then press gently. The cup lands right in the middle: enough body to feel satisfying, enough clarity to notice sweetness, and not much drama anywhere.
That balance is why it wins. If the coffee tastes sour, you can grind a little finer. If it tastes bitter, back off. The recipe talks back clearly, which is exactly what a daily method should do. It is not the most intense AeroPress cup possible, but honestly, that is the point. It is the one that keeps delivering when you are awake, half-awake, or still pretending your alarm did not go off.
Pros
- ✓ Easy to repeat with almost any medium roast
- ✓ Clean, balanced cup with simple cleanup
- ✓ Best place to learn what grind and temperature do
Cons
- ✗ Can feel a little light if you want bigger body
- ✗ Less exciting for milk-drink fans who want a stronger base
2) Inverted-style full-body recipe — best for thicker cups
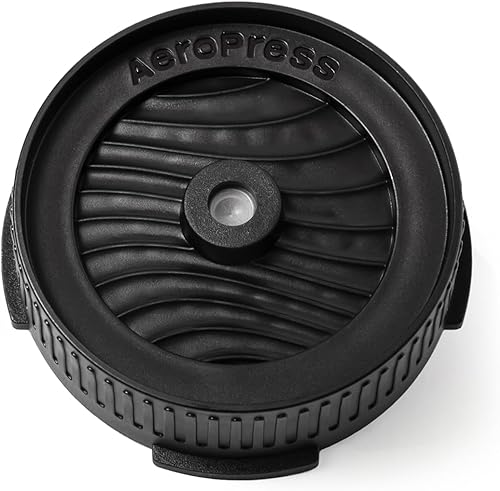
People reach for inverted recipes because they want more immersion and less early drip. Fair enough. The problem is that flipping a hot AeroPress can feel like a tiny trust fall over your counter. A flow-control cap gets you most of that same fuller body without the spill risk, which makes this version far easier to live with.
Use about 16 grams of coffee to 230 grams of water, steep closer to 1 minute 45 seconds, then press gently. The cup comes out rounder and thicker, more like whole milk than skim. You lose a bit of the sparkling paper-filter clarity, but in return you get a richer mouthfeel and more control over contact time. If your complaint about the standard recipe is "good, but a little thin," this is the first branch I would take.
Pros
- ✓ Fuller body without needing a risky flip
- ✓ Better control over steep time and early drip-through
- ✓ Nice fit for medium and darker roasts
Cons
- ✗ Not as crisp or bright as paper-filter brewing
- ✗ Adds one more piece to rinse after brewing
3) Light-roast clarity recipe — best for brighter beans

Light roasts can taste amazing in an AeroPress, but they also punish sloppy recipes fast. If the grind is too coarse or the body gets muddy, those bright notes collapse into a confused cup that tastes both sharp and dull. Paper micro-filters are the easy fix because they keep the finish cleaner and help the flavor separation stand out.
I like 15 grams of coffee to 250 grams of water here, with slightly hotter water and a gentle swirl instead of a wild stir. That pushes extraction enough to wake up the coffee without dragging a bunch of grit into the cup. Think crisp fruit, florals, and a cleaner finish instead of a heavy, dusty aftertaste. If you mostly brew washed Ethiopians, bright Colombians, or anything that tastes best when it feels lively, this is the recipe that lets them breathe.
Pros
- ✓ Cleaner cup with less muddiness and sediment
- ✓ Great for light roasts and brighter flavor notes
- ✓ Fast cleanup with paper-filter workflow
Cons
- ✗ Can feel too lean if you prefer heavier body
- ✗ Needs a decent grinder if you want real clarity gains
4) Strong concentrate + bypass recipe — best for punchier coffee
When you want a stronger AeroPress recipe, the smartest move is usually a concentrate plus bypass. Brew a short, dense base first, then add hot water after pressing until it tastes right. That gives you more weight in the cup without turning the plunge into a forearm workout. Prismo makes this easier because it keeps the brewer from dripping before you are ready.
Start around 18 grams of coffee with 120 grams of water in the chamber, steep 75 to 90 seconds, press, then top up with another 60 to 90 grams of water. The result is bold and flexible. Leave it short for milk drinks, or stretch it into an Americano-style cup. The trade-off is that this method gets blunt fast if you push it too hard. Go too fine or too concentrated and the cup can taste thick in the wrong way, like strength without much sparkle.
Pros
- ✓ Makes stronger coffee without messy inversion
- ✓ Easy to tune after pressing by adding bypass water
- ✓ Excellent base for milk drinks and short cups
Cons
- ✗ Less clean and bright than the standard paper recipe
- ✗ Gets muddy if you chase strength too aggressively
5) Travel-friendly AeroPress Go recipe — best for brewing anywhere
Travel recipes live or die on friction. The best one is not the most advanced. It is the one you can make in a hotel room, at your desk, or on a wobbly campsite table without turning the whole thing into a chore. The AeroPress Go keeps the workflow compact, which matters more than people think.
Keep the recipe conservative: 15 grams of coffee, about 220 to 240 grams of water, medium-fine grind, short stir, short steep, smooth press. That gives you a cup that is forgiving even when the kettle, the water, and your patience are all a little sketchy. No, it is not the place to chase tiny flavor differences. It is the place to make genuinely good coffee anywhere, which is exactly why this recipe deserves a spot.
Pros
- ✓ Compact kit with an easy travel workflow
- ✓ Forgiving recipe that still tastes like real coffee
- ✓ Quick cleanup in office or hotel sinks
Cons
- ✗ Smaller brew volume than a home setup
- ✗ Less room for fussy experiments and larger doses
How to fix an AeroPress recipe that tastes off
If the cup tastes sour, that usually means the water did not pull enough flavor out of the coffee. In coffee-speak that is under-extraction, but the fix is simple. Grind a little finer, steep a little longer, or raise the water temperature a touch. Start with one change, not three.
If the cup tastes bitter, hollow, or kind of harsh, back off instead. Go a little coarser, shorten the steep, or stop pressing right when you hear the hiss. Darker roasts especially go from chocolatey to rough fast if you overdo the heat or the contact time.
If the cup tastes muddy, think filter and grinder before you chase another random recipe. Paper filters clean up the finish. A better burr grinder makes the grounds more even, so the brew stops tasting like bitter dust mixed with sour pebbles. If you want help on that part, our best AeroPress grind size guide and best AeroPress coffee ratio guide are the next pages to read.
The biggest mistake is changing everything at once. Keep the dose steady. Keep the water amount steady. Then adjust a single variable and taste again. It sounds boring. It is also how you stop wasting beans and start getting good cups on purpose.
Frequently asked questions
What is the best AeroPress coffee recipe for most people?
Start with 15 grams of coffee, 240 grams of water, a medium-fine grind, and about 90 seconds total brew time. That recipe lands in the sweet spot between clean and full, and it is easy to tweak if the cup leans sour or bitter.
What grind size works best for AeroPress?
Medium-fine is the safest starting point. Think table salt, not powder. Too coarse and the cup tastes thin or sour. Too fine and the press gets annoyingly hard while the coffee can turn bitter.
What water temperature is best for AeroPress coffee?
For most beans, aim around 185 to 205°F depending on roast. Darker roasts usually taste smoother near the lower end. Lighter roasts often wake up with hotter water, especially if the cup feels flat or sharp.
How do you fix sour or bitter AeroPress coffee?
If the cup tastes sour, grind a little finer or raise the water temperature slightly. If it tastes bitter, grind a little coarser, steep a touch less, or stop pressing at the hiss. Change one thing at a time so the cup gives you a useful answer.
Related guides
- Best AeroPress Brewing Method if you want the bigger picture on standard, bypass, and no-drip styles.
- Best AeroPress Coffee Ratio if your cups swing between weak and way too intense.
- Best AeroPress Grind Size if the plunge feels too easy or weirdly hard.
- Best AeroPress Brew Temp if darker roasts keep tasting harsh.
- Best AeroPress Bypass Recipe if you want a stronger cup without choking the press.